Creating an animated cartoon is a fun, exciting process. I’m going to illustrate and explain how I created a 2:18 minute animated cartoon in about 5 weeks for client John Arnold of Arnold Entertainment Partners. John has an extensive motion picture background and we have successfully completed a lot of animation together.
The first step in creating an animated cartoon is generally getting a written outline of some sort from you, the client, describing the content of what is to appear as animation. This can be in the form of a written script, a long or short list of key points, a short story, song lyrics, a couple of paragraphs or even just a couple of sentences. I will help you put your thoughts into words that will expedite the animation process.
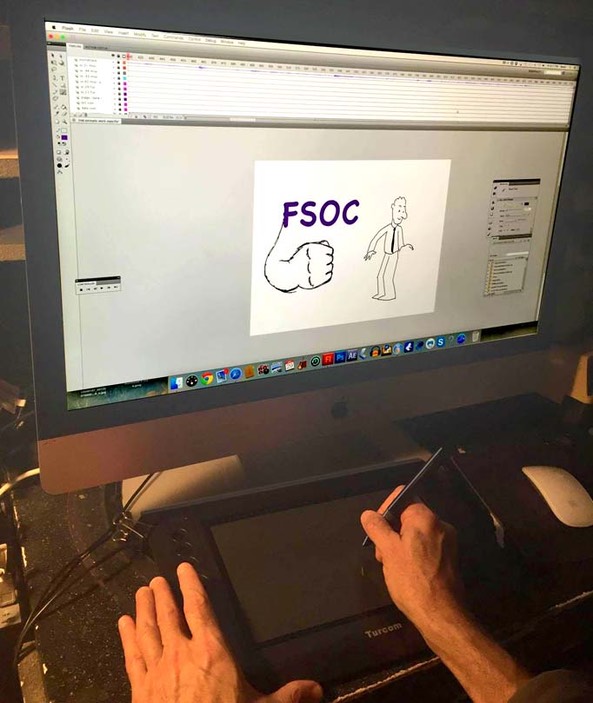
All of the preliminary drawings and rough and final animation you will be seeing below (that I created- character models, storyboards, inbetweens and final animation)) are being drawn directly into my Imac desktop with the use of a digital drawing tablet. I’m using Adobe-based Flash CS5 for this particular project- it has robust vector- based drawing tools and is animation friendly. No paper or pencils are used at all.
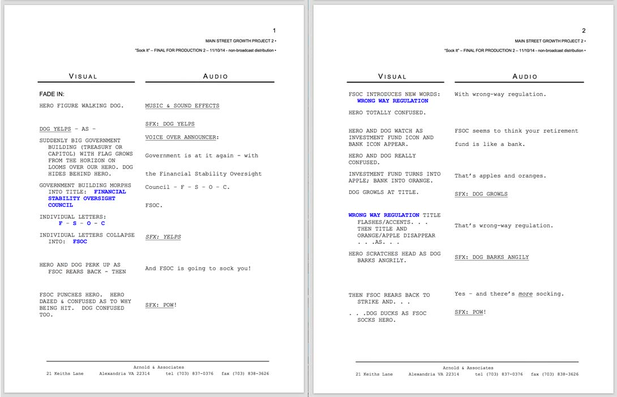
Here’s the format in which John gives me the content he needs to have animated- a typed script, 8 pages long. This will be the basis of John’s soundtrack, seen below. An actor will read the script and sound effects will be added to that recording as well. It will be edited as necessary before animation begins. A final soundtrack is generally recorded and given to the animator before final animation begins:
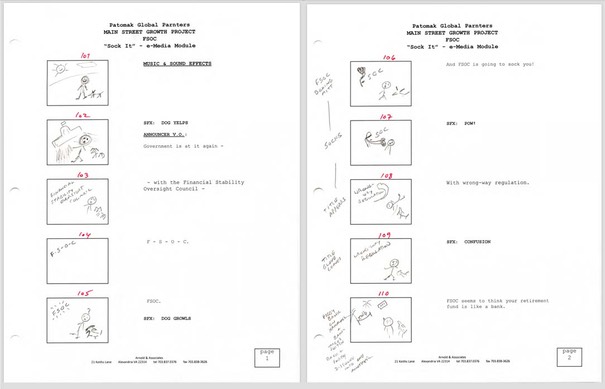
He also provides a 10 page “storyboard” with his very rough sketches representing specifically what he wants to see in each “scene” of the animation I am providing him. Even though his drawings are very rough, they are enormously helpful:
John also provides a soundtrack with narration and sound effects. This is, basically, a reading of the script he provided above, at a pace and timing he is happy with, with sound effects added. THIS SOUNDTRACK is the ultimate unyielding constant in this process- all drawings used in the process of creating animation MUST WORK WITH THIS APPROVED SOUNDTRACK. All drawings in the continuation of this process will be altered as needed to FIT THIS SOUNDTRACK:
If you don’t already have a soundtrack don’t worry- I will help you with that. Most soundtracks for animation are recorded before the animation process begins. The drawings used in an animated cartoon are made to “fit” the soundtrack in such a way that the illusion of synchronization is created.
Because this pre-edited, final approved soundtrack is 2:18 minutes long, and my animation has to fit it, I know my final cartoon will last just about 2:18 minutes.
Let’s review for a second- BECAUSE John is a seasoned filmaking profession he understands what’s involved in creating an animated cartoon, and is able to supply in great detail exactly what he is looking for. A lot of clients needing animation don’t have John’s level of experience. I will help you plan, in detail, all of the above steps- script, storyboard, soundtrack- and all the remaining details we will be examining shortly. Every element will be worked out with you to your satisfaction before animation begins, and every element will be submitted for your approval.
Now I can start drawing. I know, from looking over John’s supplied materials, that our lead character is an “average Joe” type of everyman—and his dog. John also suggested, as a stylistic approach, the work of R.O. Blechman. R.O. is enormously popular and has been for many years, with good reason- his work has successfully communicated with millions of people around the word for decades. This means a more simple (but not necessarily easy!) black and white line art approach- perfect, as we need to create a fair amount of animation in a short time. The characters will exist as black and white line art drawings on a field of white- no need for color characters or color backgrounds. A substantial savings in time and cost.
Here’s my first model sheet in the designing of our chatacters:
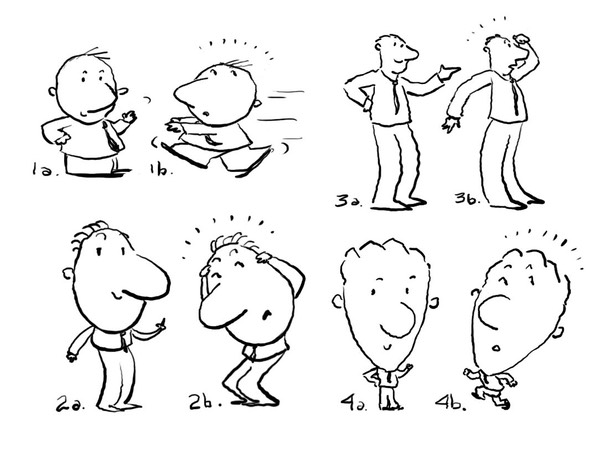
John’s preference was 3a. and 3b. so I further refinded those drawings:
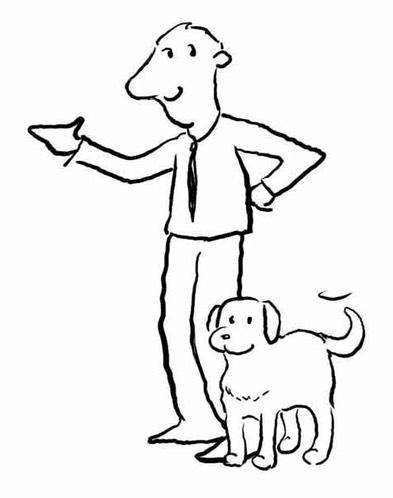
This is our final model sheet. Some model sheets are more complex than others- this will do for our purposes. My blog page on the creation of characters can be found here. Many examples of model sheets from other projects can be found here. Ultimately this character appears in the final animation with a more simple, thinner solid black line outline as opposed to the "thick- and -thin india-ink hand drawn” line used in this model sheets directly above. That’s OK- the spirit of the character is captured, and that is my client’s main concern.
My next step is recreating John’s storyboards, seen above, using rough but refined drawings of our approved characters. My nine page approved storyboard becomes the ultimate “blueprint” for our animated cartoon, combined with the aforementioned soundtrack, and captures in detail the contents and color of each scene:
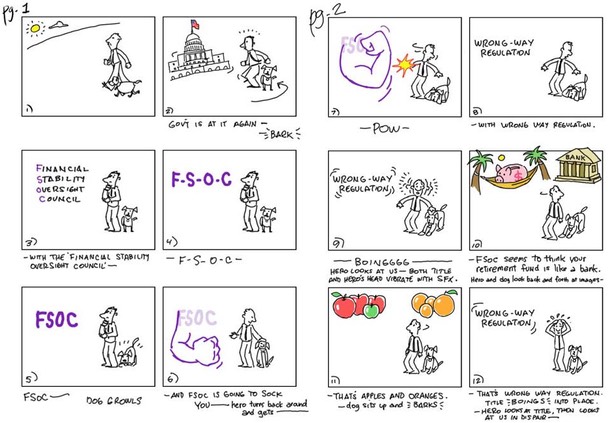
Let’s take a look at a frame by frame comparison between several of John’s original, loose storyboard panels and my more refined versions:
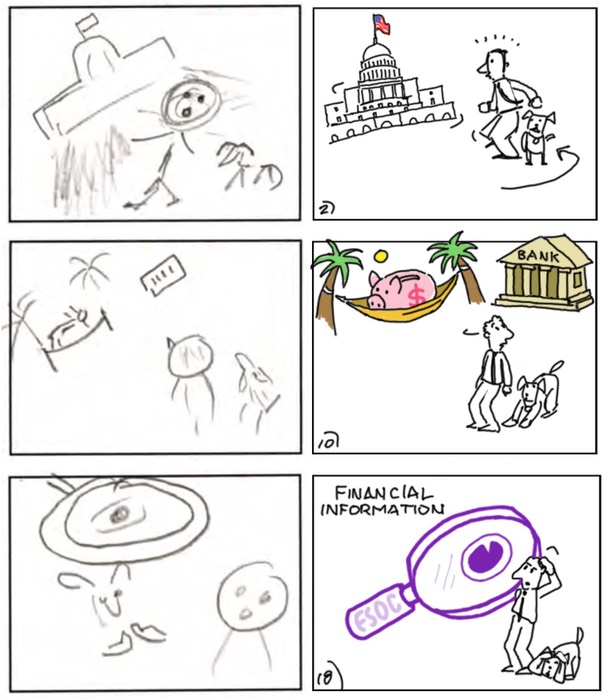
The point here is to show how helpful John’s rough storyboard sketches are in transmitting ideas he considers useful and important. His rough storyboard is a GREAT aid in creating my more complex version. Never be afraid in sharing your rough sketches and ideas- they can be SUPER helpful in making your animation as good as it can be.
OK! NOW I have created an approved, revised storyboard, representing our entire cartoon from first frame to last, in “comic-strip” style consecutive panels. Time to take each frame of my storyboard and combine it with the soundtrack to make sure everything is flowing smoothly BEFORE animation begins. The Flash CS5 software enables me to drop each induvidual frame of my storyborad into a timeline that’s “married” to my soundtrack- the “test movie” that is created below is called an animatic, and will be a great aid in determining any weaknesses in the flow of our story thus far. Extensive pre-planning will make your animation as great as possible. Here’s the 1st, rough animatic:
OK- the animatic looks fine and it all flows well, so now animation can begin. I like starting animation with what I consider an important or difficult scene- it might take the most time to get just right, so best to start early. I decided to start with the first scene in the cartoon, showing our main characters doing a jaunty, bouncy walk while whistling. A walk can show the personality of a character immediately, so it’s important and a great place to start.
Out come the reference books!


I always look up how the great animators did something before attempting to do it myself. For the “bounce-walk” reference art above I used a book that has inspired and taught animators and artists for generations- Cartoon Animation by the great animator Preston Blair. The latest version is available at Amazon.com here. The very finest book I’ve ever seen on how to create animation- with extensive details on constructing walks, runs and many other topics- is the great Animator’s Survival Kit by animation legend Richard Williams, available here. Both books are absolute must-owns for aspiring animators everywhere.
Here’s a test of my walk animation:
I will tweak it a bit in the final animation but it’s fine for now. The thicker line of this test will be thinner in future tests and in the ultimate animation- my call as director and producer of animation.
It’s now time to create the final key animation frames that will be used in our final animation.
That means re-drawing, "on model" and with particular attention paid to the “position in the frame” of the text and characters, each of the rough key poses that were used in the earlier, approved animatic.
Everything has to “read” very clearly so the viewer immediately understands what’s going on, with no confusion.
I’m using a method of animating called “pose to pose”. That maens I create, for example, drawings 1 and 10, and later I will do the “in-between” drawings (2 through 9) that “link up” drawings 1 and 10 that give an illusion of motion.
All of the drawings in the storybord are “key poses”. “In-between” drawings will be added later, between each of these key poses, linking them all together to create the illustion of animatiion.
It’s a good method to use when the drawings need to match a soundtrack, and it’s also a great way to make sure our character looks consistent throughout the entire cartoon because, through key poses, I have placed the character where he needs to be, in the exact pose he needs to be, throughout the entire cartoon BEFORE animation begins. I know every key pose reads clearly throughout the entire spot and our characters looks the same in every key pose. It’s the finest pre-animation guide ever- now I just need to make it move and come alive by adding inbetween drawings to the already approved and established key poses.
I literally trace over every rough key pose created in the first animatic thanks to the drawing tools available to me in Flash CS5. I already know the placement of the characters and text is working, so now I redraw every rough pose, refining and clarifying as I go. I put all the rough sketches “on model”- all the refined key poses must read clearly and quickly so the viewer gets the message with the first viewing.
Here is the second animatic- I have added the previous walk cycle animation at the beginning of this new animatic-you will notice gaps, and it’s a little rough, but basically all of the “key” (very important) animation poses are in place and, with this as a guide, I can start final animation:
All of the above is working, so now I can go back and add the “in-between” drawings that smooth out the animation.
There is a “boiiinng” sound effect at around the 17-18 second mark in the above animatic, when our main character reacts to a big "sock- in- the- head” with his dome vibrating in a funny fashion. This reminded me of a classic Disney cartoon in which Goofy reacts in a similar way- so back to the reference books! THE classic Disney animation reference book is the great Illusion of Life: Disney Animation by the brilliant artists Ollie Johnson and Frank Thomas. Another absolute must-have, Amazon has it here.
Sure enough!
Just the reference I was looking for:

I won’t do an EXACT copy of the above drawings, but I will use the above information as a guide to create my own “boiiinng” animation. For me it’s always about advancing yourself as an artist and animator by creating opportunities to try new things with each project that comes along. I have a long way to go, but I am making my living doing what I love and learning and advancing with each project by trying different things- and being paid to do so.
So now I go ahead and put in all of the “in-betweens” from key pose to key pose to make this final animatied project as good as possible within the alloted time frame. Thanks to all of the extensive pre-planning I have already caught any major errors before they happened and march forward in confidence- I always tell my clients that thanks to all the careful preplanning? The only surprise they will face at the end is how great it all looks when it’s done. Most animators I know, including myself, live and breath this stuff and I endlessly tweak and review every bit of this job so it’s as good as I can make it:
So! There it is. A 2 minute 18 second spot done in about 5 weeks. My client John is delighted, because I’ve met or exceeded his expectations, which is what I always strive to do. It’s why we’ve done a dozen projects together over the years. He can count on me- cause it’s all about the prep work, and I won’t let a single step go forward until it’s figured out to my satisfaction- and my standards are high.
Thanks to neighbor and friend Carl Mahoney for the beautiful photo of my computer set up. Carl’s excellent photography website can be viewed here.
Happy to answer any questions- contact me via email here.
Many more animated spots I’ve directed and produced are here.