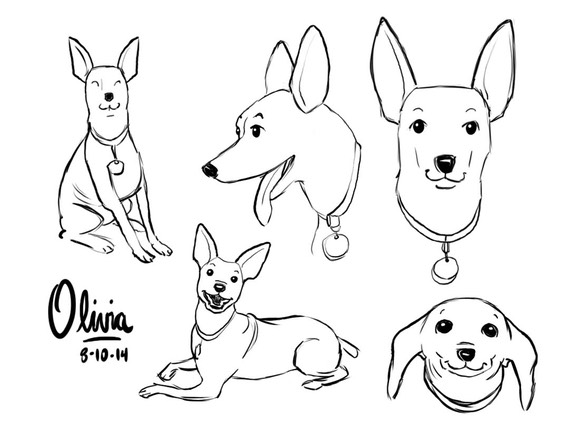
The first step in creating illustrations for your project is designing the characters that appear in your story. A “model sheet” is created for your approval. This is so you know, and approve, what your character will look like before I create illustrations featuring your characters. It’s a great, safe way to make sure we are all on the same page when it comes to your character designs. It insures that your character will look the same (staying “on model”) from one illustration to the next, as I will use the approved character model sheet as a reference every time I draw your character. You must approve and sign off on each character’s design before illustrations begin. Here’s an example of a model sheet created for one author’s work featuring her dog character. Model sheets are typically either created from imagination, or based on photos or a combination of the two- this one was based on photos:
Once the look of your character is developed to your satisfaction we determine how many illustrations you need. If you have a predetermined amount in mind, or specific ideas you wish to see illustrated, you let me know. Often times I will read your text and suggest passages that I think would benefit from an illustration. We will create a master text list of illustrations with a brief sentence or two describing the content of each illustration. Then the actual drawing begins.
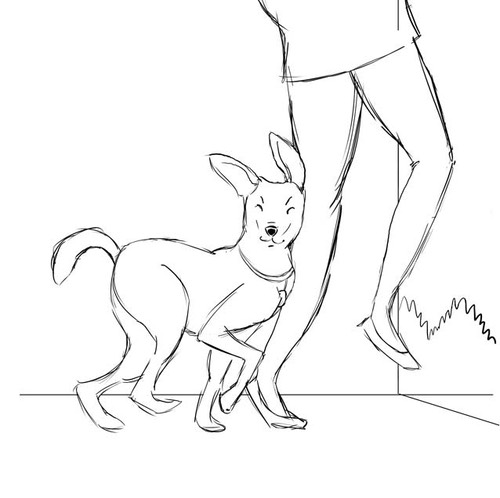
I will create “roughs” of each illustration for your approval. These will vary in degree of detail, but the idea is to furnish you with a rough drawing of each illustration, with enough detail so you get an idea of the content of each illustration. This is the stage at wish you will suggest changes to the illustration until it is approved. All of the roughs for your entire story will be created for your approval before final artwork is rendered. Here is a rough illustration based on the above dog character model sheet:
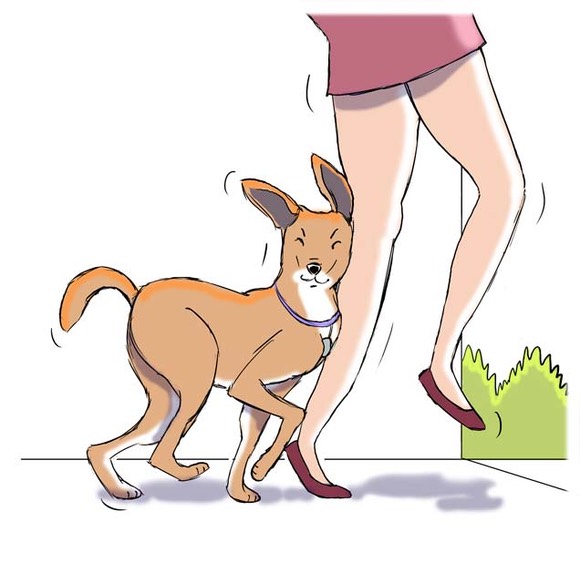
Once approved, the final illustration is created. Here is the final fully rendered illustration based on the above approved rough:
Final illustrations are generally delivered as 300 DPI “camera ready” layered photoshop files ready for your printer.
Here’s another example of a model sheet- in this case, my client was provided with a choice of several characters with subtle differences:
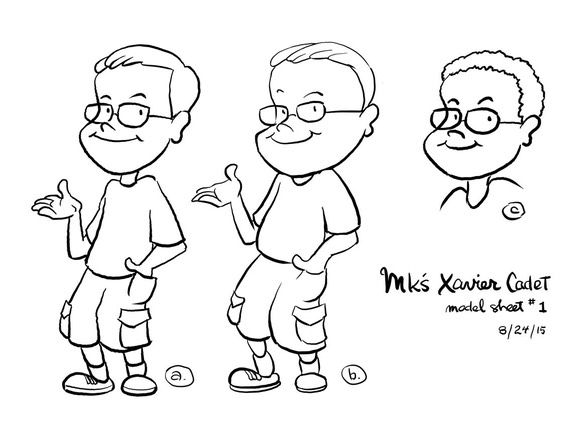
My client chose character “a” as his favorite, so that character was used to creat a revised model sheet featuring the above-approved character “a” with his father:
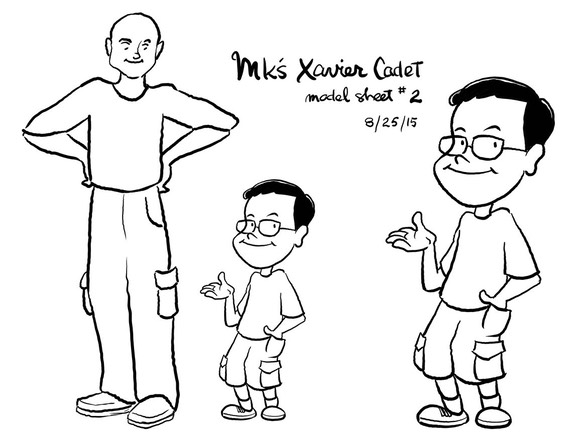
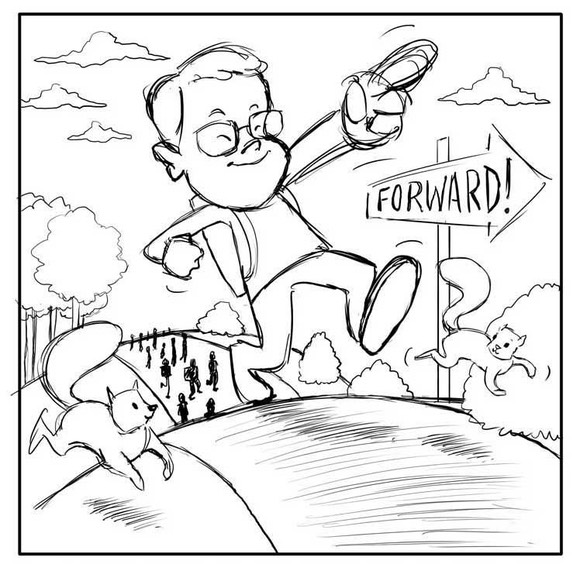
Once the above model sheet is approved rough illustrations can begin. Here’s a rough illustration featuring the above-approved character “a”:
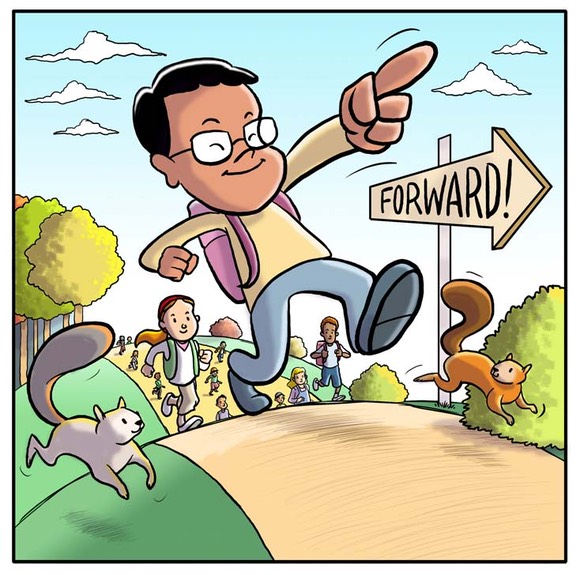
And here’s the final rendered illustration based on the above-approved rough:
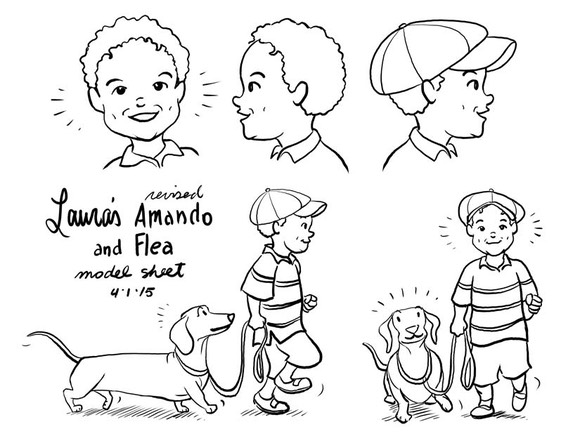
Here’s another example of a model sheet:
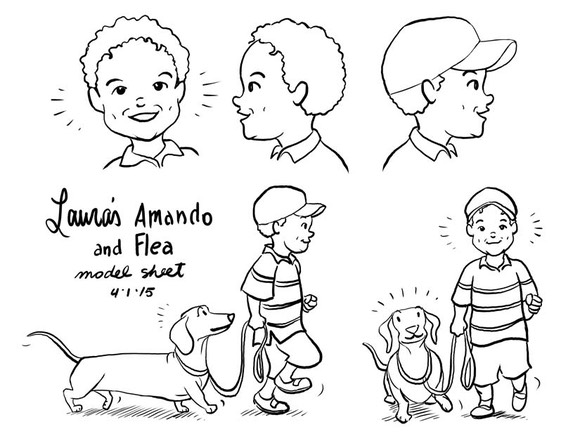
In the above example my client loved the characters but wanted to see a different hat on the boy. So I created a revised model sheet with a different hat:
Once the above model sheet is approved I can begin creating rough illustrations. Here’s a rough illustration featuring the above- approved characters:
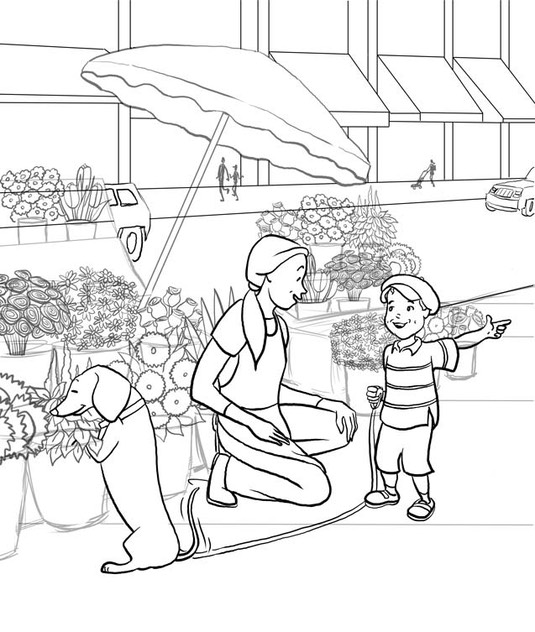
And here’s the final illustration based on the above- approved rough:

Creating illustrations is a very “hands-on” process, and your input as client is absolutely essential in each step of the way.
Many more model sheet examples, for first-time clients to world-famous clients, can be found here.
Many more finished illustration examples, again for first-time clients to world-famous clients, can be found here.